How can it be time for another Challenge over on our challenge blog (here). Time is just whizzing by. The theme this time is Anything but a card. I can do that!!! But first a huge thank you to everyone that took part in the challenge, it was fab to see so many creations, we hope you all had fun.
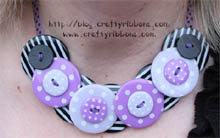
Anyone who has visited us this season at an exhibtion will have seen me wearing a button necklace, and I promised that I would make a tutorial for you all. Speared on by the fact that I will be wearing the necklaces (yes I have a collection in different colours!) in Paris next week, and my French is not good enough to talk them through the demo!, this Anything but a card challenge has come just at the right time.
So here goes with my tutorial.
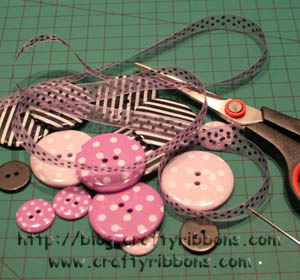
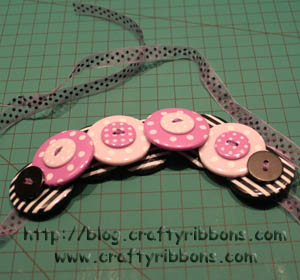
Step 1. Gather all the bits you need, 5 large buttons for the bottom row, 4 large buttons for the top row (I use 2 different colours), and 6 small buttons, they can all be found stripes here and spots here. You also need a needle, scissors and some Organza swiss dot ribbon here.
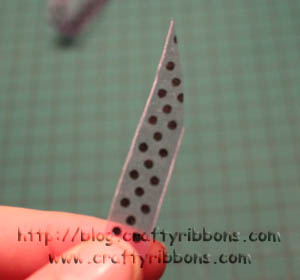
Step 2. Cut the ribbon to a very fine point.
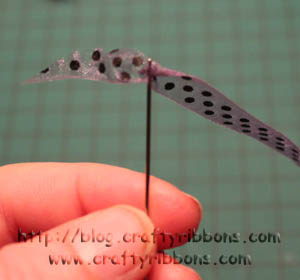
Step 3. Thread a normal needle.
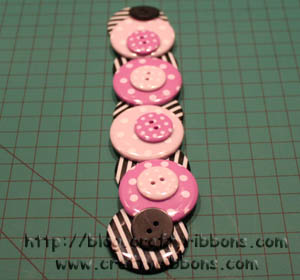
Step 4. Lay the buttons out to form the necklace. This ensures you pick up the correct buttons.
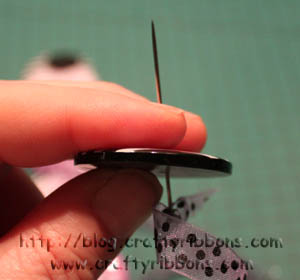
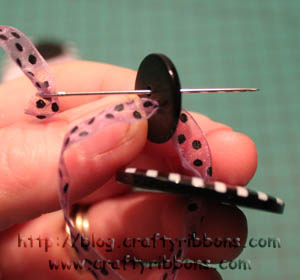
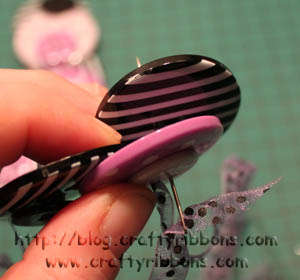
Step 5. Thread the first large button from the bottom row onto the needle.
Step 6. Sew up through the small button that sits on top.
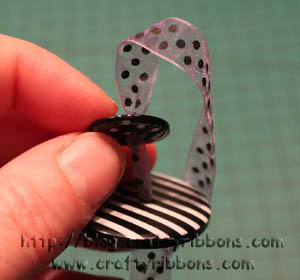
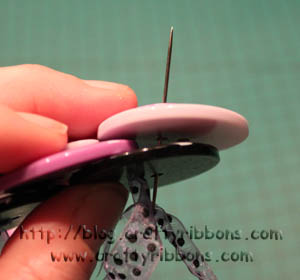
Step 7. The ribbon goes across the button and back down through the other hole.
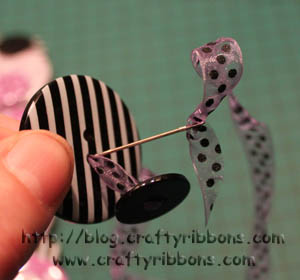
Step 8. The small button at the start and end of the necklace acts as a stopper, so the buttons do not slide along the ribbon. So we take the needle through the same hole the ribbon came up through.
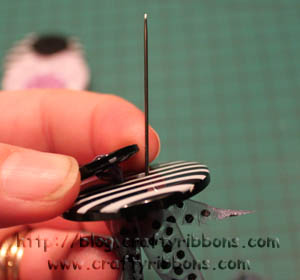
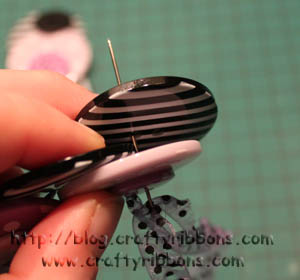
Step 9. Come back up the other hole in the large button. Pull the ribbon tightish so that it snuggles to the button.
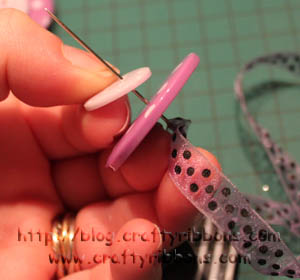
Step 10. Pick up the next two button from your line and go up through both.
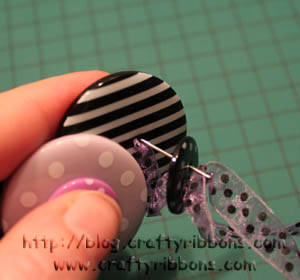
Step 11. Take the needle back through the spare hole in the small button, the large button AND a new large button from your line. Pull the ribbon tightish.
Step 12. Take the ribbon up through the bottom large button and pick up the next set of large and small buttons from the line.
Step 13. Repeat 11 and 12 until you come to the last small button.
Step 14. As this is the last stopper button it needs to be sewn back through the hole you have already come up through.
I just tie the ribbon at the back of the neck with a bow.
So come on and join in with us on our Crafty ribbons Challenge Blog HERE , you can have some fun and might even win some ribbon. The prize is our famous Bev's Bag! The winner can pick which ever one they would like. How cool is that!

If you have not got time to enter the challenge, do check out the DT girls creations they are awesome and are ooozing with inspiration - ribbon inspiration of course!
We are putting the final touches to our Paris stand today, the last minute stock has been returned from the out girls so just needs putting on the pegs.
Hope you all have a great day.